I would like to wish you all a Happy New Year wherever you are in the world. This year I have decided for me will be one of the most productive years I have had. After losing my business it has given me a great opportunity to restart my life try out new things and look for new jobs I may never have tried if I wasn't given this opportunity. Above all that I would love to improve my photography and to start the year off I have joined a group on flicker called "View 52" which is basically a short version of the 365 project. Basically all you have to do is take one image per week for 52 weeks if anyone would like to join in please feel free to call in at View 52
Thanks Again for Viewing
James

Showing posts with label photographs. Show all posts
Showing posts with label photographs. Show all posts
Sunday, 1 January 2012

Monday, 14 November 2011
ISO Explained As I see It
What is ISO?
In Simple terms ISO is the sensitivity of light to the sensor/film. By now you would have seen settings like ISO 100, 200, 400, 800, 1600 etc.
So What do these numbers mean?
Basically a higher ISO number means that the film/sensor is more sensitive to light. So at ISO 200 it is two times more sensitive than ISO 100 and at ISO 400 it is two times more sensitive than ISO 200 and so on and so forth. This setting is great for the digital age as you can change your ISO whenever you need to without changing your memory card as back in the film days you would have to change your film when you wanted to change ISO.
When Do I Use ISO?
ISO is used when you are in a situation where the lighting is very poor and you are unable/don't want to use flash I.E sporting events, indoor weddings, parties, evening shots. And we use it to increase the shutter speed to enable us to hand hold the camera/freeze motion as at ISO 100 you will find the shutter speed will decrease a hell of a lot during low light situation so in order to get the picture you desire in a low light situation you may need to play with the ISO settings.
What's The Downside To Higher ISO?
There is only one answer to this is my eyes and that is NOISE (grain in your pictures) used correctly a little noise can add to the image but used incorrectly it can make an image look awful. You need to remember this ISO tends to show itself more in the shadow rather than the highlights so noise will become more apparent in dark scenes.
What ISO Settings Do You Advise?
Personally I feel this is down to your individual taste and the situation you are in. For me during normal conditions I use between 100-200 ISO and for indoor low light situations I use 400-800 ISO. I have not done any night time shots without flash so have not stepped over 800 ISO as yet
I hope this has helped shed some light on ISO
Thanks for reading
James
Sunday, 13 November 2011
My Day Shooting Water Drops


These a a few of the images I took today. If you like the effects of water droplets I really urge you to try it out it is so much fun
Thanks For Reading
James
Tuesday, 8 November 2011
Time For A Bit Of Water Art
This is a subject I have really began to enjoy shooting and I am sure you will see many many drop shots from me as I am still yet to get the shield effect drop.
I have been chatting a lot to people on flickr and looking at drop images and have picked up some great tips along the way and the improvement I have seen has been very noticeable.
Here are two images of my first ever attempt and shooting water drops: -




I have been chatting a lot to people on flickr and looking at drop images and have picked up some great tips along the way and the improvement I have seen has been very noticeable.
Here are two images of my first ever attempt and shooting water drops: -


As you can see these are not the best images but that is the whole point at the time I was happy with the fact that I had actually captured the drops I didn't really pay attention to the picture itself. When I did which took a while and to be honest after I kept trying out new methods I noticed picture one was very grainy and the focus was not that great and image 2 even though the form is great the focus was poor.
I have moved on since these original images (well I hope I have)
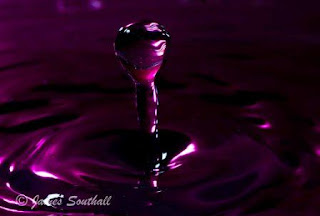
Here Is My Most Recent Attempt At Water Drops Taken Only Yesterday


As hopefully you can see the images are far more interesting they have some colour to them that have given them some life the focus is far better and they generally look far better than my first attempt.
Have you ever wanted to try drops but thought I don't have the kit?
Well then take that thought out of your head. Yes it would be great to have a fully kitted out studio with fantastic instruments in which to create the drops and fancy lights. But back here in the real world all you need is a sandwich bag full of water suspended above pierce a small hole with a needle, a paint rolling tray full of water and I used a table matt with pink birthday paper wrapped around it as the background stood it up behind the tray, and then used a flash gun attached with a cable as I don't have a wireless one pointed the flash directly at the background and this then cast the purple look I have in the images above. Also a macro lens would be the best option but you can also do this with your kit lens just turn off the auto focus and then place a pen where the droplets fall and manually focus onto the tip of the pen move the pen away and fire away
I hope this helps you a little I know it did me
Thanks For Reading
James
Monday, 7 November 2011
Find Direction And Motivation
A few things I have picked up along the way
Are you sitting in front of your computer now thinking how will I improve my photography?
I know I was but I am not about to start telling you as I don't think I am qualified to do so. The only advice I can give you is get out there with the camera and shoot as often as you can (I know you are probably sat there thinking this is all photographers say but its the only way) this makes you aware of the world around you and makes you start taking notice of every little detail, a shooting bud, a tiny insect, a moody sky, a perfect candid moment etc etc. Once you have learnt to view the world through a photographers eyes (and you will know when that happens when you start noticing things on your travels you wouldn't have paid attention to before) then you will be ready to sit down and start to learn the science behind the settings (and let me warn you this is a science and not something I have fully mastered yet).
Will I learn fast? (sounds silly but I know the frustration of "I just don't get it")
Well this is down to the time you put into it. For me shooting nearly everyday has made me aware of the settings and where to apply them for each situation. And in the space of 11 months my photography has improved tremendously and that's thanks to Practical Photography and Flickr
Should I join a course?
For me this is something I strongly think is a must. Not just to learn about settings but to give you focus as I am sure like me you were taking photos not of things that are not interesting but not in an interesting sort of way. Any one can take a picture but its how it is viewed that makes that picture and to hold that attention you must create a master piece and this will all be down to its framing, composition, depth of field, point of view and so on. I am not saying go out and spend hundreds of pounds on sitting courses but find something like I did with Practical Photography join your local camera club, go to college or simply just open an account with flickr. Just by joining in with one of these courses, clubs or internet groups gives you plenty of things to focus on and gives you a direction and motivation to shoot more often. Flickr for me has been a godsend as there is plenty of groups to join and fun things to join in with and in time you will find out what sort of photography it is you enjoy most. For me at the moment still life and macro has kind of become my thing which shocked me when it happened but I just love the way things look close up and I love experimenting with water drops, smoke, fire anything really that can create some great finishes.
Do I Need All The Expensive Kit?
In an ideal world we would all love the expensive kit but that is simply not possible unless you are one of the fortunate. But I will touch on this in another post as there are many ways of getting "similar" looking shots to the pros with things lying around your home (no I don't compare my shots with pros with the best kit but I do try and get the look just on a budget because sooner or later you will want kit you simply can't afford and with these items it will get you closer to the shot you want)
What if my shots are not up to standards?
Let me tell you we are our own worse critiques you will never know how good/bad your shots are unless you put them in front of like minded people then you will find out shots you think are great others don't get yet images you think are bad for some reason other people love them. Its nice to love your own shots but as Ansel Adams once said "there are two people involved in a photograph the photographer and the viewer" and in every shot you need to try and please the viewer and the only way to find that out is to get viewers hence flickr is a great resource.

In The Space Of 11 Months I Have Gone From The Fungi Above To The Beautiful Blue Flower Below

So don't forget the main tip I can give you is get out there take photos and join some sort of group or course to gain direction and motivation
Thank you again for viewing my blog
Are you sitting in front of your computer now thinking how will I improve my photography?
I know I was but I am not about to start telling you as I don't think I am qualified to do so. The only advice I can give you is get out there with the camera and shoot as often as you can (I know you are probably sat there thinking this is all photographers say but its the only way) this makes you aware of the world around you and makes you start taking notice of every little detail, a shooting bud, a tiny insect, a moody sky, a perfect candid moment etc etc. Once you have learnt to view the world through a photographers eyes (and you will know when that happens when you start noticing things on your travels you wouldn't have paid attention to before) then you will be ready to sit down and start to learn the science behind the settings (and let me warn you this is a science and not something I have fully mastered yet).
Will I learn fast? (sounds silly but I know the frustration of "I just don't get it")
Well this is down to the time you put into it. For me shooting nearly everyday has made me aware of the settings and where to apply them for each situation. And in the space of 11 months my photography has improved tremendously and that's thanks to Practical Photography and Flickr
Should I join a course?
For me this is something I strongly think is a must. Not just to learn about settings but to give you focus as I am sure like me you were taking photos not of things that are not interesting but not in an interesting sort of way. Any one can take a picture but its how it is viewed that makes that picture and to hold that attention you must create a master piece and this will all be down to its framing, composition, depth of field, point of view and so on. I am not saying go out and spend hundreds of pounds on sitting courses but find something like I did with Practical Photography join your local camera club, go to college or simply just open an account with flickr. Just by joining in with one of these courses, clubs or internet groups gives you plenty of things to focus on and gives you a direction and motivation to shoot more often. Flickr for me has been a godsend as there is plenty of groups to join and fun things to join in with and in time you will find out what sort of photography it is you enjoy most. For me at the moment still life and macro has kind of become my thing which shocked me when it happened but I just love the way things look close up and I love experimenting with water drops, smoke, fire anything really that can create some great finishes.
Do I Need All The Expensive Kit?
In an ideal world we would all love the expensive kit but that is simply not possible unless you are one of the fortunate. But I will touch on this in another post as there are many ways of getting "similar" looking shots to the pros with things lying around your home (no I don't compare my shots with pros with the best kit but I do try and get the look just on a budget because sooner or later you will want kit you simply can't afford and with these items it will get you closer to the shot you want)
What if my shots are not up to standards?
Let me tell you we are our own worse critiques you will never know how good/bad your shots are unless you put them in front of like minded people then you will find out shots you think are great others don't get yet images you think are bad for some reason other people love them. Its nice to love your own shots but as Ansel Adams once said "there are two people involved in a photograph the photographer and the viewer" and in every shot you need to try and please the viewer and the only way to find that out is to get viewers hence flickr is a great resource.

In The Space Of 11 Months I Have Gone From The Fungi Above To The Beautiful Blue Flower Below

So don't forget the main tip I can give you is get out there take photos and join some sort of group or course to gain direction and motivation
Thank you again for viewing my blog
Subscribe to:
Posts (Atom)